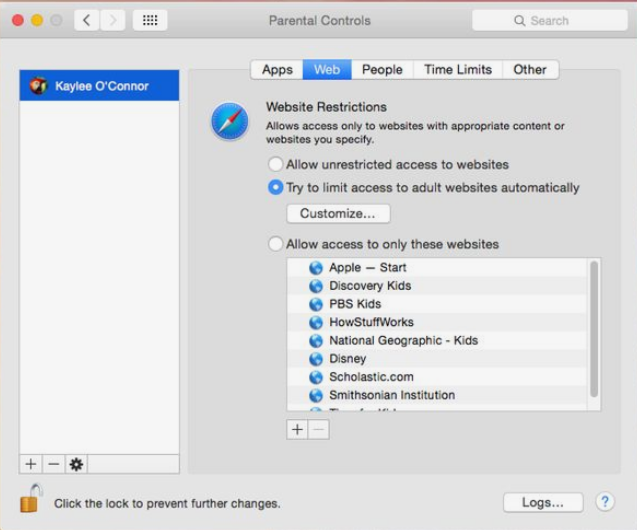
Have you used the Parental Controls on your Mac? Many novice users may have not touched this feature or even don’t know what can this function do. Actually, it could be helpful when you need to share your Mac to kids, and even friends or relatives. With Parental Controls enabled, you can manage, monitor, and control the time they spend on your Mac, the websites they can visit and the contacts they can chat with.
To turn on parental controls on your Mac, here are the step-by-step instructions:
To turn off parental controls, just head to System Preferences > Parental Controls, type an adiministrator name and password after clicking the Lock icon, and then select the user, click the Action pop-up menu, and choose Turn off Parental Controls.
Now you know how to utilize this function to ensure a safe experience for your kids.
Wanna get more Mac tutorials and tech info? Follow us to keep yourself updated.

Copyright © 2024 HowtoRemoveApp.com


 HOME
HOME
Comments
Leave a reply