 HOME
HOMEHow to Remove Xtorrent on macOS
Removals on macOS are quite different from those on Microsoft Windows OS. This page can help you understand the basic knowledge of system maintenance, guiding you through the confusion of removal problems. If you happen to be a newbie of Mac Computer, take the chance to learn something. Now go with how to correctly remove Xtorrent.
Removing the useless applications from your computer is still one of the simplest ways to speed up your system, where everything lives to work, occupying part of the hardware resources including hard drive space and memory. So there is one thing you can be sure of: too many junks will slow down your computer, and they are accumulating during the operation. If you don’t deal with them termly, issues would be generated.

Let’s temporarily isolate other Windows logicality from our mind, forget about the Start menu, Control Panel, Registry Editor, etc. Regards to removals on macOS, keywords shall be Finder, Library, Preference, and Application Support instead. The following are specific steps for you to fully remove Xtorrent. I believe after going through the whole process, you will be much more familiar with your Mac.
Using App Uninstaller by AppUninstaller.com to Breezily Remove Xtorrent
In the very beginning, I would like to introduce an easy approach to uninstall this app on Mac, just in case you are like “Geez, don’t put me through the knowledge. What I’m only interested in is how to quickly get things done”. There you go:
1. Download - Install - Run App Uninstaller
2. Select - Run Analysis
In the list of installed applications, select Xtorrent as a target, and hit “Run Analysis”.

3. Complete Uninstall
It displays the files to be removed with their names, sizes and locations behind. Click on “Complete Uninstall” to proceed with the removal. If you are prompted with the confirmation, click on “Yes”.
Seeing it states “Congratulations! Xtorrent has been successfully removed...” means you have achieved your goal. You can click “Back to Interface” to reach the list of installed application and check whether the program has gone.
OK, it’s time to present you with the instruction of manual uninstall, which will also work to remove Xtorrent. Just consider this as a free tour on your system.
How to Remove Apps on Mac, similar to Xtorrent
4. Empty the Trash
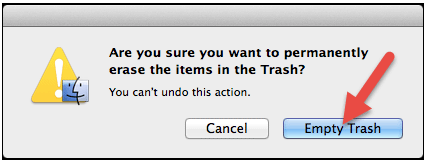
Do it once you are certain that you will never use Xtorrent again (or in a short time at least). Right-click on the Trash icon, select “Empty Trash”. It will ask for your confirmation, also click “Empty Trash” on the message. This will permanently remove Xtorrent and everything inside, freeing up the hard drive space on your Mac.
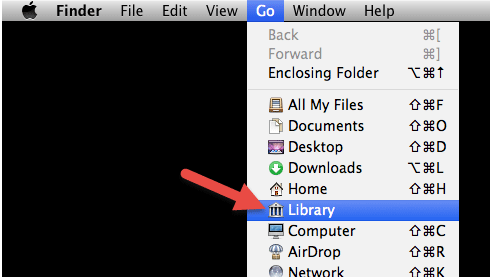
5. Finder - Go - Library
In the entire removal process, the Library folder could be a blind spot to many users. So this is teaching you how to delete the Support and Preference Files from it, which are those left behind after you remove Xtorrent application. Usually they are very small, so if you attempt to reinstall the application, you can keep them. Otherwise, just do the following to clean them out.
In the upper-left corner of the screen, hold the “Option” key on your keyboard, click “Go” on the Finder, and select “Library” to open the Library folder. To ensure the complete removal, it would be better to unhide the Library folder permanently.
6.Unhide the User Library folder
Open Finder and navigate into your home folder, then successively click Macintosh HD - Users - Username.
Click “View” in the menubar, and select “Show View Options” or press “J” on your keyboard. On the new window, tick the box before “Show Library Folder”.
Open Finder, and navigate to Applications - Utilities - Terminal (double-click to launch).
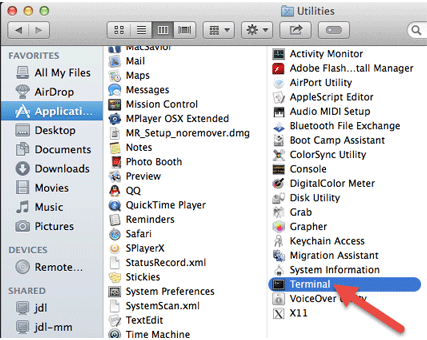
Type “chflags nohidden ~/Library” into Terminal (without the quotation marks), and press “Return” on your keyboard to run the command.

How to re-enable the feature? Run the “chflags hidden ~/Library” command in Terminal.
7.Browse - Trash
Under ~/Library/, ~/Library/Preferences/, and ~Library/Application Support/, look for the files or folders with Xtorrent’s name or its developer’s name.
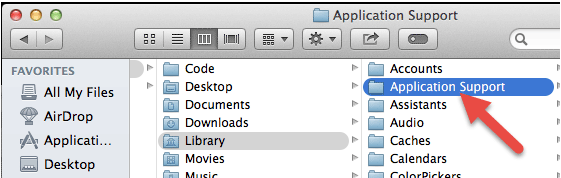
Then right-click on it, select “Move to Trash” to delete it. If you can’t “Empty Trash” right away, restart your Mac and try again. This is how you can manually remove Xtorrent on your Mac.
Uninstall guides of related apps

Categories
- 1
- Browsers 1544 apps in database
- 2
- Business Software 66233 apps in database
- 3
- Communications 85445 apps in database
- 4
- Desktop Enhancements 74502 apps in database
- 5
- Developer Tools 20820 apps in database
- 6
- Digital Photo Software 7761 apps in database
- 7
- Drivers 1496 apps in database
- 8
- Educational Software 62272 apps in database
- 9
- Entertainment Software 72350 apps in database
- 10
- Games 5123 apps in database
Completely removes:
- Bundled apps
- Preferences files
- Cache files
- Support files
- Other hidden file