Apple’s latest macOS Sierra adds the Mail Filters to help manage your messages in the Mail app, and users can utilize this feature to filter (show and hide) the emails in their mailbox for certain criteria. Interested in how to use it? Continue reading.
To turn Mail Filter on, you will first need to select one of your mailboxes from the Finder sidebar. Then, look for the teeny circular button containing three horizontal lines at the top of the message list. Once you click on this button, the Filter view is displayed, and you will see only the messages which meet your filter criteria. Also, you can activate the filter view by pressing the keyboard shortcut: Command + L.
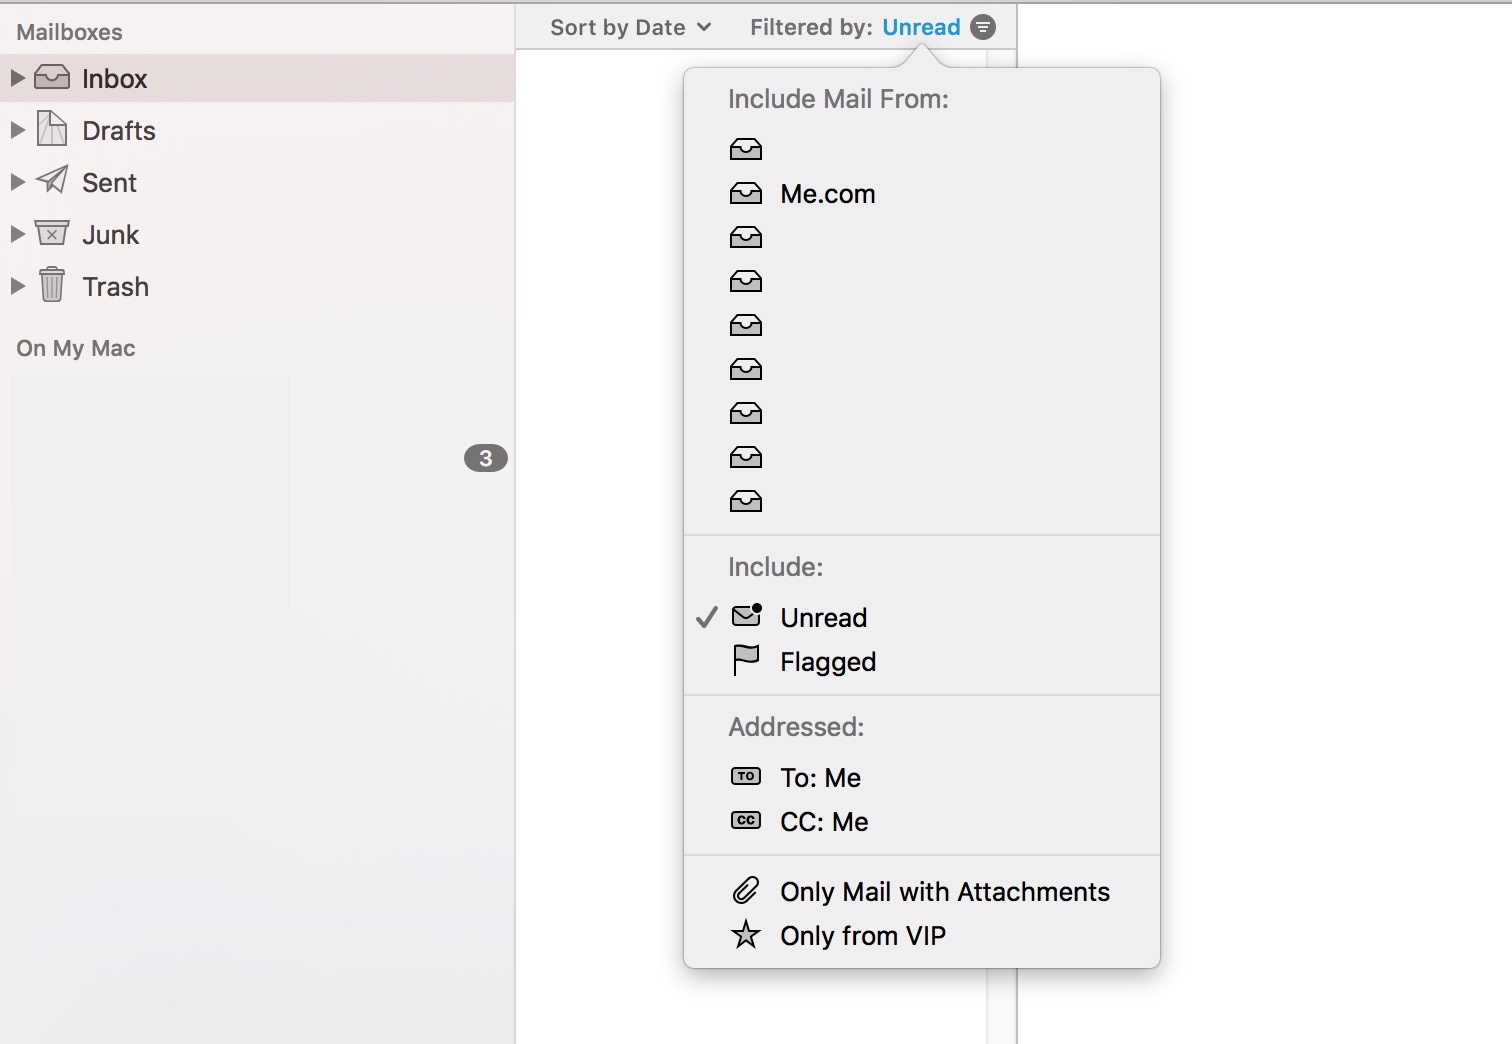
Now you can configure the Mail Filter criteria. To do so, select the circular button to turn filters on and then click the text to choose the filter from the list of filter criteria that pops up subsequently. You can configure the criteria by clicking the desired filters. For instance, if you want to view your unread emails from your VIPs, choose the options Unread and Only from Vip, and check marks will appear beside the names.
After the configuration, click then blank place outside the filter box to close it. Whatever criteria you choose, the number of active criteria will show in the filter view. And the emails that meet the criteria will be listed on the pane. Finally, to turn off the filters and show all the messages in the mailbox, just click the circular again.
It is quite useful yet easy trick to view your emails, right? Have you got it yet?
Copyright © 2026 HowtoRemoveApp.com


 HOME
HOME
Comments
Leave a reply