Have troubles in using Affinity Photo? Consider to uninstall Affinity Photo from your Mac? If you have no idea how to fully remove this app, this tutorial will help you out.
After testing Affinity Photo on our machine, we summarize three methods to uninstall Affinity Photo from Mac computer. You can choose to adopt one of the options below.
Normally, the trash-to-delete method works for removing most third-party apps on all versions of macOS/Mac OS X. Here are the detailed steps to carry out the uninstall:
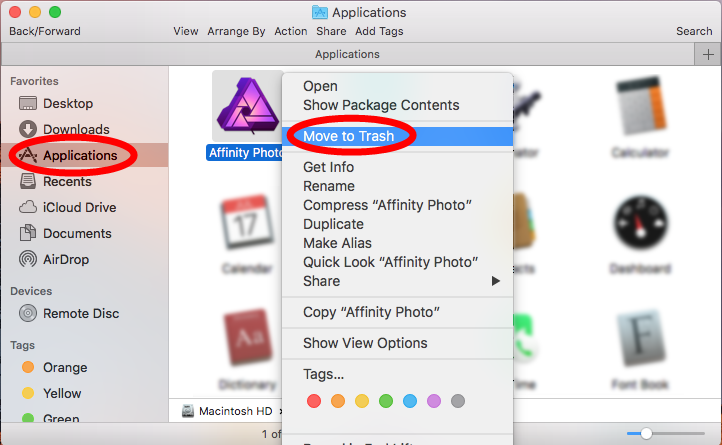
Once you delete Affinity Photo in the Trash, this app is gone permanently from your Mac. Before that, you can still put it back to the Applications folder for use.
Note that if you cannot trash Affinity Photo, go to quit this app before the uninstall.
Affinity Photo can be downloaded and installed from the Mac App Store. If you’ve installed the App Store version, you can remove it through the Launchpad, like that:

Note that the uninstall is executed as long as you click the Delete button. To re-install Affinity Photo afterwards, you can download it again in the Mac App Store.
What can you do if you encounter problems in uninstalling Affinity Photo by the manual way? Here’s a solution recommend for you: to run an automated, professional tool to fix the issues. In this part we test Osx Uninstaller and here are the result:
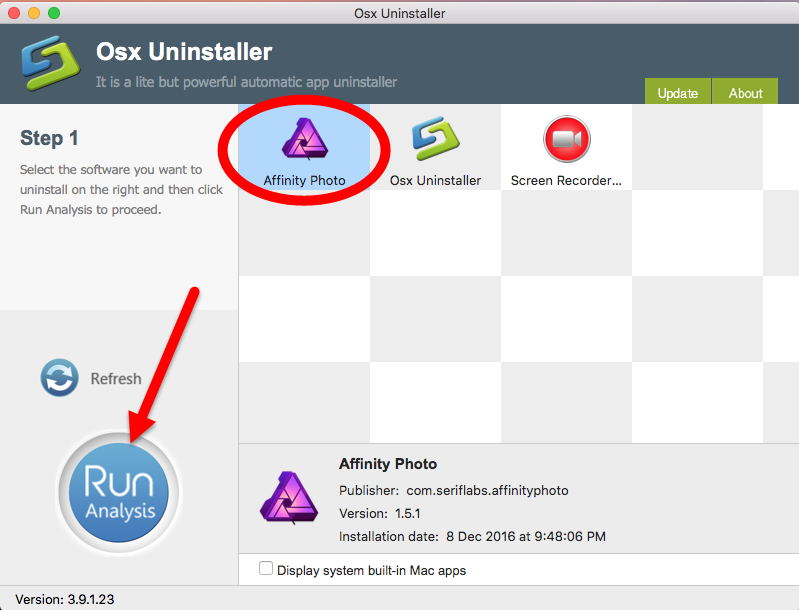
Soon you will be prompted that Affinity Photo has been successfully removed from Mac. Then you can close Osx Uninstaller and reboot your Mac if necessary.
So that’s how you can uninstall Affinity Photo using three different approaches. Which option listed above is the most time-saving and efficient? Our conclusion is that using Osx Uninstaller saves much time and avoid troubles in that kind of tasks.
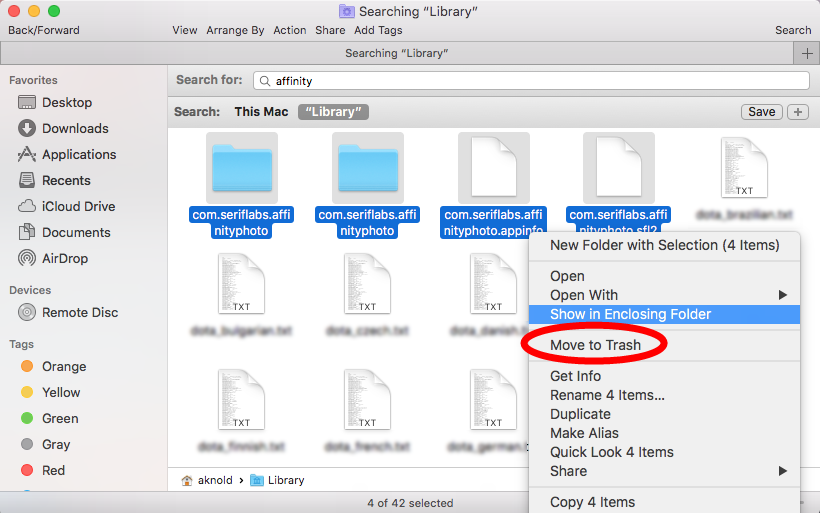
Why say so? If you remove Affinity Photo (or any other apps) by deleting it in Applications folder or through Launchpad, there is one issue you may be faced with: the Affinity Photo leftovers. In our test, some Affinity Photo components still remain in the hidden Library folder even though Affinity Photo has been removed.
To ensure a clean uninstall, here’s a little trick to hunt down Affinity Photo remnants:
Manually deleting app vestiges requires a little more time and may involve some risk of mistakenly deleting other app files, while using Osx Uninstaller to take over the uninstall task will free you from performing those laborious, repetitive works.

Copyright © 2026 HowtoRemoveApp.com


 HOME
HOME
Comments
Leave a reply